Using WASM In Scripts
This tutorial will walk you through importing a WASM file into the editor and using the SimpleWasmMonoBehaviour to instantiate a WASM module in a script.
SimpleWasmMonoBehaviour is not the only way to load a WASM module and does not give you full control over everything, but it is the simplest option to get started. Other options for loading WASM assets include:
- Addressable Loading - Use the Unity Addressable Asset System to load WASM modules.
- Manual Loading - Directly instantiate WASM modules in your own code.
Tutorial
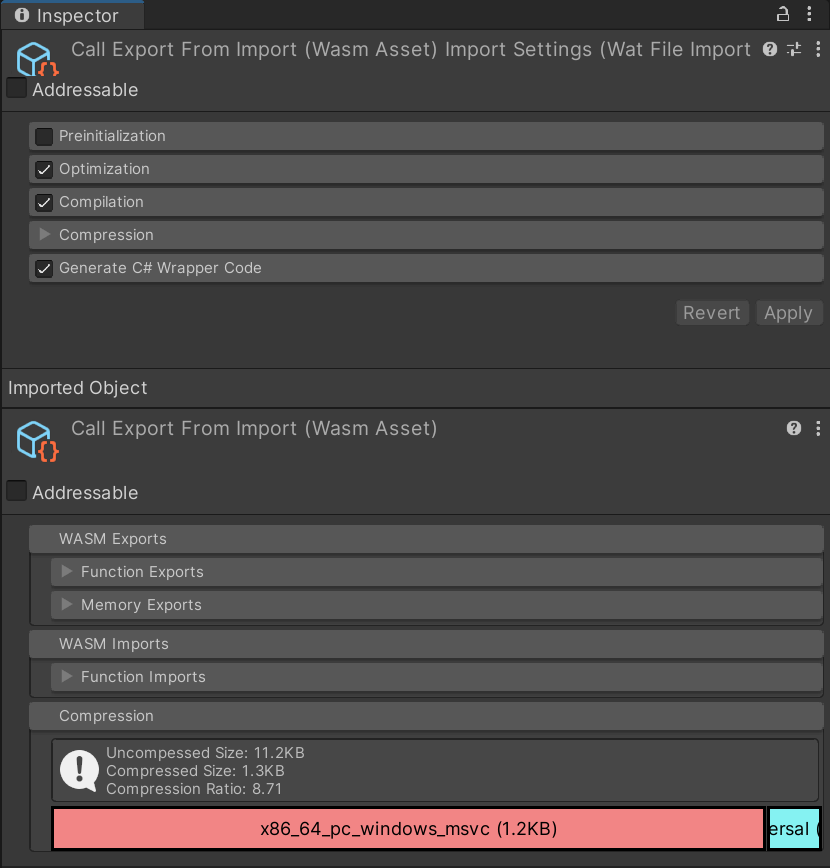
1. Import WASM File
Drag and drop a .wasm or .wat file into your project. The file will automatically be imported as a WasmAsset. By default a C# script will be generated next to the file.
See the Importing WebAssembly documentation for more detail on import settings.
2. Create a MonoBehaviour
Create a new Unity script which uses SimpleWasmMonoBehaviour<> instead of MonoBehaviour. Inside the angle brackets put the name of the generated C# script.
public class WasmDemoScript
    : SimpleWasmMonoBehaviour<AutogeneratedScriptName>
{
}
This script will automatically handle most of the setup steps for running WASM code.
3. Configuration In Editor
In the Unity Editor the script will show two fields, Wasm Asset and Engine Config. Drag and drop the imported file into the Wasm Asset field.
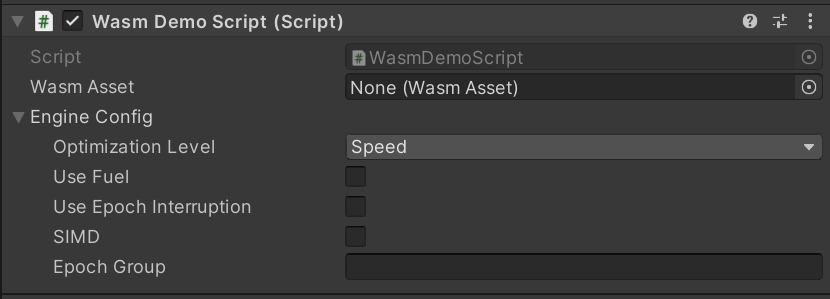
The Engine Config field controls how the WASM code will be compiled and executed. Including Fuel and Epoch Interruption to limit buggy/malicious code execution.
4. Loading
When OnEnable is called the WasmAsset will begin loading in a background thread, it may be several frames before it completes loading. There are several callbacks available to monitor the loading process:
protected override void OnLoadingWait(Task loading)
{
    // This is called every frame while loading

    // Call this to wait for loading to complete (will stall the main thread!)
    // loading.Wait();

    base.OnLoadingWait(loading);
}

protected override void OnLoadingFailed()
{
    // This is called if loading failed
    Debug.LogError("Oh no");
    base.OnLoadingFailed();
}

protected override void OnWrapperCreated(AutogeneratedScriptName wrapper)
{
    // This is called when loading is complete
    // You may use `wrapper` any time after this point until `OnDisable` is called
    base.OnWrapperCreated(wrapper);
}
5. Configuration (Optional)
See this tutorial for more information on exposing C# methods to WASM.
By default nothing is accessible to WASM code, it is a completely contained "sandbox". However some WASM code requires access to external resources such as random number generation, the filesystem, or other systems in your application. Use the ConfigureLinker callback to make things available to WASM:
protected override void ConfigureLinker(Linker linker)
{
    // Add a C# method which can be called by WASM
    linker.DefineFunction("module", "add", (int a, int b) => a + b);

    // Add a WASI random number generation
    linker.Define(new CryptoRandomSource());

    base.ConfigureLinker(linker);
}
6. Run Code
The Update method is called on this script just like any other MonoBehaviour.
The wrapper is an instance of the auto generated script (called AutogeneratedScriptName in this tutorial) which has public methods and properties for every WASM item (functions, globals, memories and tables). Functions can be called as normal C# functions:
void Update()
{
    var wrapper = TryGetWrapper();

    if (!wrapper.HasValue)
    {
        Debug.Log("Not yet loaded");
    }
    else
    {
        wrapper.CallSomeWasmFunction();
    }
}
7. Destroy
The WASM Instance will be automatically disposed in OnDisable, a new one will be created if OnEnable is called again. The Store and the Linker will be automatically disposed in OnDestroy.